3 Easy Fish Finder Tricks Anyone Can Do! (Catch More Fish)
Modern electronics are increasingly complex but these are simple tricks you can do to make your time on the water more effective! Quit fiddling with your graphs and get back to fishing! Tim gives 3 or 4 quick tips in today's video that will completely change how you use your depth finder in the future. Quit struggling in shallow water, wondering if you're seeing fish out deep, and trying to stay safe at night; all with just a few clicks of a button.
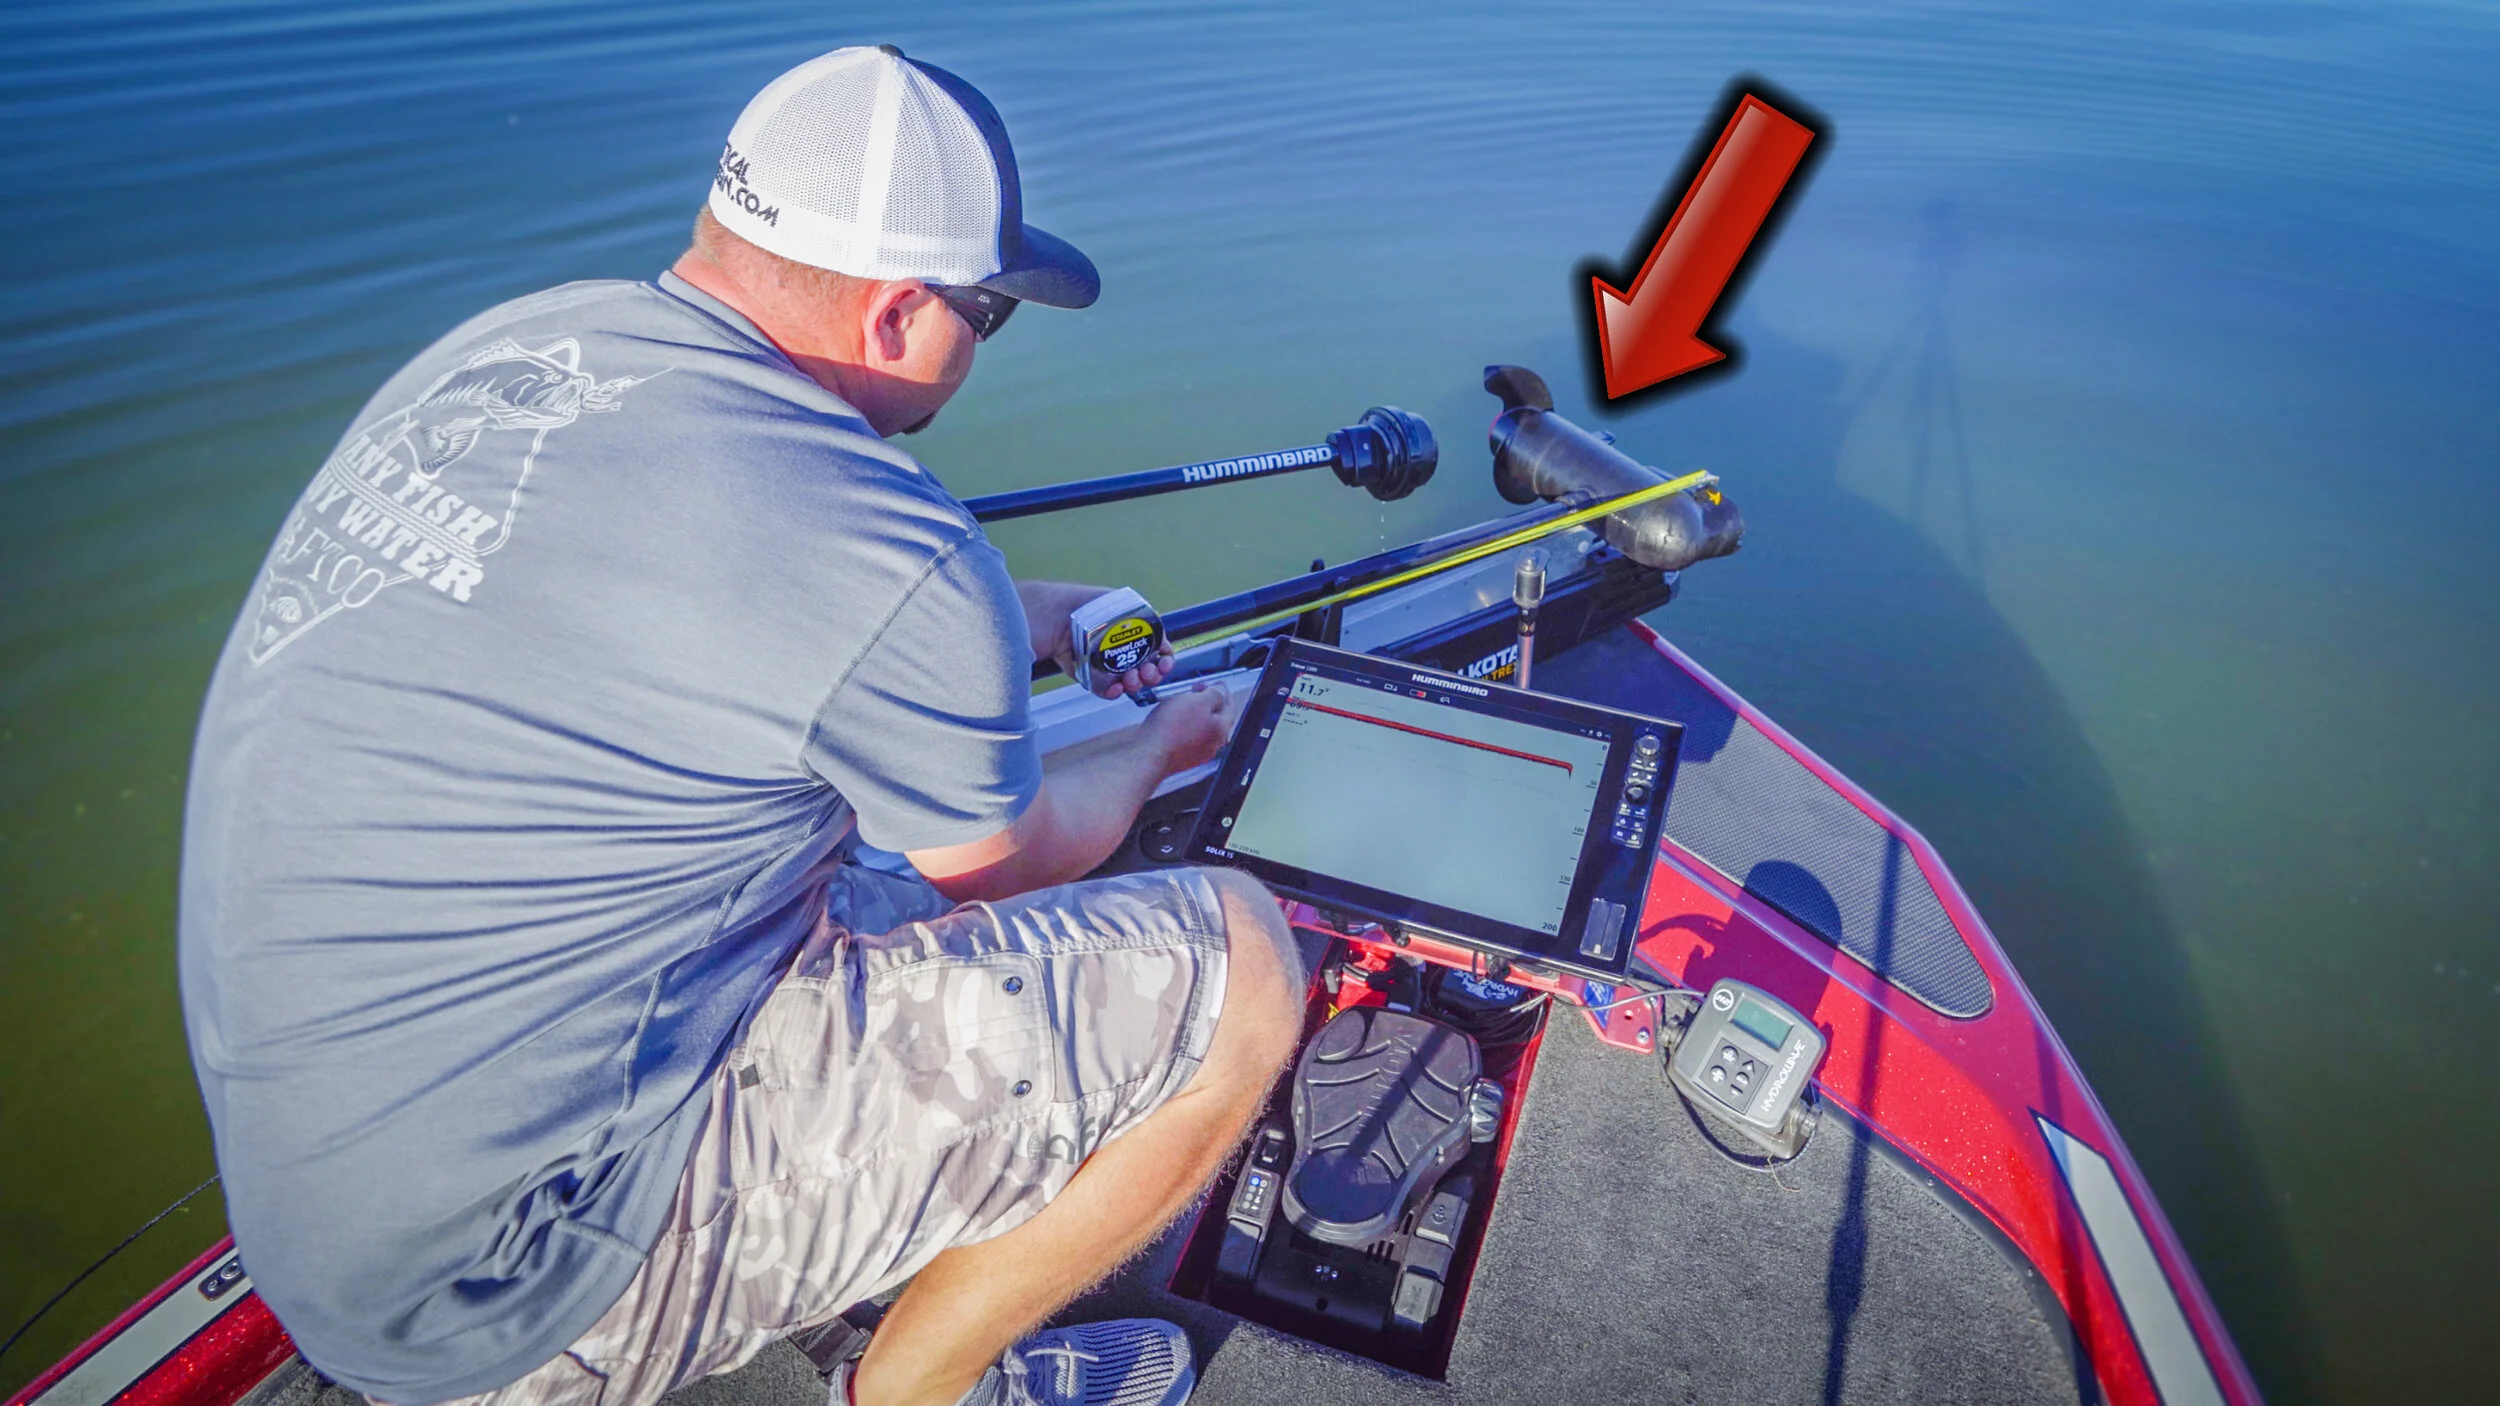
Tim kicks the video off with how to adjust depth offset. This simple trick will completely change how you fish shallow water. Most boats have never had the trolling motor offset corrected (this means that your trolling motor may read 6 feet deep while in 4 feet of water). This obviously creates safety concerns, it also creates fish problems. Knowing your EXACT depth from trolling motor to bottom or surface to bottom is just a few clicks away.
Next, Tim shows how to adjust your color palette to see fish, and fish size, much more clearly. He goes on to show how to use on-screen way pointing to eliminate the need for market buoys. Gone are the days of locating fish, setting buoys, then returning to catch them. See the fish, set the point, catch the fish, move on.
Last, but certainly not least, Tim explains how to change your map's orientation. Virtually every graph comes with the map set to "North Up". While this is great for knowing where you are, it can be difficult for you to chart your path around obstructions quickly, especially at night. By switching your map orientation to "Heading Up" you'll always be able to see what is immediately in front of you. This quick tip will completely change how you use your fish finder's mapping functions.
Most modern electronics have all of these functions. Below you'll find a list of the exact equipment that Tim is using in the video, as well as links to several budget-friendly options that will offer most or some of these functions.
Tim's equipment...
-Humminbird Solix 15 G2 Electronics: http://bit.ly/2Hazsej
-Humminbird Solix 12 G2 Electronics: http://bit.ly/2AE2YDB
-Minn Kota Ultrex 112 DI Link Trolling Motor: http://bit.ly/2RqrT4v
-Humminbird 360 Imaging: http://bit.ly/2K8jPl4
Budget-Friendly Electronics...
-Humminbird Helix 5 G2: http://bit.ly/2TNndFW
-Lowrance Hook 2 5 Series: http://bit.ly/2Y2sjk2